Thursday, March 14, 2019

Sitecore Hackathon 2019 Experience


Its been two weeks since the Sitecore Hackathon, the competition that I wait for to come every year. I would like to write a bit about my experience participating in it.

This is the third year I participate in it with my favorite team (Vision Team) Hanin Daoud and Duaa Abu Gharbieh from Jordan. This time, I participated with them from the USA, and despite the time difference, we were able to make this happen!

Prior to the beginning of the hackathon, my friends and I had a long call discussing some potential ideas that we might be able to use if any of the categories that were going to be presented suit with one of them.

During my work with Sitecore CMS, one of the ideas that I have always wanted to implement is adding a feature to enable the user to select more than one item at a time and delete them all together.

When we received the kick off email, I was so excited that one of the categories presented is suitable with this multi selection idea.

With the great help of my team, we were able to create a multi selection feature that enables the user to select more than one item at the same time, and we implemented this functionality in both publishing and deleting.

Following is a short video explaining what we did:

Unlike the last two hackathons that I participated in, this is the first time that I actually am hopeful to win 😊 as I feel that what we did is a great feature that makes content authors’ lives much easier!

Looking forward to the results of the Hackathon..

Good luck to all participants!


Adding an SMS Link (href=sms:) to the General Link Field Type in Sitecore


In this blog, I am going to explain how to add a custom SMS Link to the General Link Field Type in Sitecore. I always use this sms functionality in my website, so I thought, why not adding it as a custom type in Sitecore so that I would be able make use of it in rendering it as Sitecore Link Field

In order to add this custom sms link, let me walk you through the steps:

1- Login into Sitecore and go to the Core Database.
2- Add a new item under the following path /sitecore/system/Field types/Link Types/General Link/Menu
In the following screenshot, it is named as "SMS".


3- Fill in a display name for this item (e.g Insert SMS Link). This field value is the text that is displayed when you add a general link field to a template and go to an item of this template to inset a link:


4- Set the message field to: contentlink:smslink(id=$Target). This is the case that would navigate the user to the InsertSMSLink Form when he clicks on "Insert SMS Link".


5- Create a class called "SMSLink". This class is going to open the SMS Link Form popup when you click on "Insert SMS Link" link. It checks for the "Message" value and opens the popup accordingly:


6- Navigate back to the Core database, and go to the following path: /sitecore/system/Field types/Link Types/General Link. Set the value of the "Control" field to : content:SMSLink.

7- Add a new customized config file in order to register the SMSLink Control:

8- Now let us add the xml of how the popup would look like when the user clicks on "Insert SMS Link". This file has to be added to the following path : "/sitecore/shell/Applications/Dialogs". Create a new folder there to place the xml file in.


9- When the user fills in the message, and clicks on Ok, the following code will be executed: Another class is created too as a processor to render the SMS link (RenderSMSLink):

10- In order for this processor to work, you need to patch a configuration for it under the pipelines section:

You are all set now!

This way, we are going to still be able to render the link as an Html Sitecore Link (@Html.Sitecore().Field(Templates.TemplateName.Fields.ItemLink,Item))

Hope this is useful :)

Happy Coding!

Friday, October 27, 2017

Sitecore Symposium 2017 - Day Three And Four Experience

This day started with a lovely breakfast, mingling with Sitecore people then the keynote for the day.

Jake Johannsen was a guest at the symposium and he was the one starting and ending our days talks with a beautiful flavor and his funny jokes :D

Some of the sessions I attended was about people sharing there experience in dealing with Sitecore, like implementing Sitecore solutions with Helix and deploying Sitecore Microsoft Azure. Some Sessions were actually demos to the steps followed to implement this.

One of the main topics I was interested in was implementing personalization in Sitecore, discuss the nuts and bolts of using this tool, and see how do I get started with it.

Day 3 ended with an amazing chat between the Legendary actor, producer and writer Mark Hamill and Scott Anderson (Sitecore CMO). He was talking about his experiences playing iconic "Star Wars" character.

Day 4 was the last day for the symposium which started with a breakfast as usual :) and some sessions like the Sitecore rules engine, getting started to cloud.

Last keynote of the day was giving us a glimpse of the of the future product direction of Sitecore and when is the venue of the Symposium 2018 going to be.. which is Orlando!

It was a lovely experience after all and I am really looking forward to next year's one!


Sitecore Symposium 2017 - Day Two Experience


So day 2 started at 7 am with enthusiasm. I was looking forward to the amazing experience I am going to get. This was the first day of sessions too!

It started with an introduction to what is new in Sitecore world regarding the newest versions, enhanced functionalities and new features in Sitecore like Sitecore xConnect, Cortex, etc..

The sessions that I was in interested in and I did attend them had to do with implementing xDB and EXM, deep dive into SXA, and implementing Sitecore on Microsoft Azure.

It was a long lovely day getting to know the Sitecore community and expanding my Sitecore knowledge.  Second day finished at 5 o'clock.

Stay tuned for my Day 3 experience :)


Tuesday, October 17, 2017

Sitecore Symposium 2017 - Day One Experience

Attending Sitecore symposium was one of my main goals to achieve, despite the long trip I went through to reach Vegas!

So yesterday was the first day of the Symposium, my feeling was like how am I gonna introduce myself to people :) the registration went smoothly.

At the reception, I got to see and meet people in person and it was an honor to meet this love community. The reception was amazing. I even won the NishTech 100 Dollars Amazon prize :)

It was good to get to know Sitecore partners in the Partners Pavilion and visit the booths to know more about Sitecore business.

Looking forward to the second day of the symposium and starting the sessions.


Sunday, May 21, 2017

Sitecore Publishing Service on CM – CD Environments

Publishing Service is one of the great features Sitecore has. I used to have issues publishing my site as there are lots of items in there and it was a slow procedure since that you need to wait until the publishing ends so that you would be able to continue working on Sitecore. 

Now, with this service, you are able to continue working on Sitecore while publishing your site, plus this process is much faster than before.

The reason behind me writing this blog is to focus on the publishing service installation on a content management server as I faced a couple of issues before installing it on sitecore, so I would like to share those issues with you.

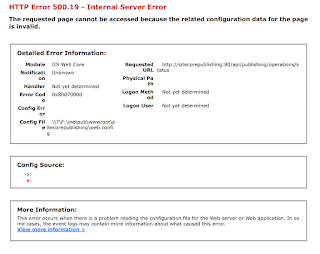
 As we know, one of the basic steps that needs to be done before installing the service is to install the .NET Core. When I followed the steps to install the service host, I used to get an error when trying to test if the service works before installing it on Sitecore (you should get the following result {"status":0} usually to make sure that the service works fine but I never got it).

The error was not informative to be able to figure out the issue. After some investigation and the help of Sitecore Support, I found out that installing .NET Core is not enough on the CM server. You need to make sure that the ASPNetCoreModule is installed (This is required to host .NET Core projects in IIS). You can check if it is installed by opening IIS and looking for it in the modules section.

If you didn’t find it, you need to install ASP.NET Core Server Hosting Bundle (http://go.microsoft.com/fwlink/?LinkId=798480), and this would solve the issue.

When installing the service host and adding the connection strings file that connects the service with the Sitecore databases, you need to add another node for the pub database. Moreover, you need to add a target definition node under the “targets” node for the pub database:


Note: The target node should have the same name as the publishing target item name in Sitecore. Ex.: “DEV-CM”.

Hope this blog is useful :)

Monday, February 13, 2017

Custom Experience Analytics Reports

Sitecore has really cool features to implement. One of them is creating custom reports in the Experience Analytics Dashboard. Sometimes, customers need to know essential information in order to improve their website.

In order to improve the website content and words used in its pages (SEO), the customer needs to know what are the most used words in the site search. Therefore, I am going to walk you through the steps to track the words used in the site search and creating a report that displays those words and how many times are they being searched for.

By default, the internal search keywords are not being tracked in Sitecore. Therefore, in order to track them, appropriate search event should be registered when the search occurs.

Following code should be added when the user searches for a word in the site, and hits submit:


The above code means that the search keyword is being tracked and saved in Interactions table in the analytics mongoDB:


The data then gets aggregated to the “Fact_SiteSearches” table in the Analytics database in SQL.
We’re almost there! All what we have to do now is to create a custom report in the Experience Analytics Dashboard to show the words and their count.

To create a report page, you should do the following:
  1. You should have Sitecore rocks installed and a connection created to your website.
  2. Navigate to the core database in the website content tree using the following path: core/sitecore/client/Applications/ExperienceAnalytics/Dashboard
  3. Right click on any report category (for example Aquisition), and click on Add – New Item.
  4. Select the “ExperienceAnalyticsReportPage” template, and enter a term (recommended to start with “experienceanalytics”).
  5. Click Ok.
  6. There will be PageSettings created by default under the report item you just created.

Now, we have to choose a chart component to the report created. In order to do so, follow the below steps:
  1. In Sitecore Rocks, right click on the report page item you created, and click on Tasks – Design Layout.
  2. In the Design Layout, click on Add Rendering.
  3. In the dialog box, select a chart control to use for your report (Example: select an “ExperienceAnalyticsBarChart” if you want to display a bar chart).
  4. Click Ok after choosing the rendering you want.

After that, you need to add a parameters item to configure the report metrics (which will be “Count” in our example):
  1. Right click on the PageSettings item that is under the report item that you created and click Add- New Item.
  2. We will have to choose the “ExperienceAnalyticsBarChart Parameters” since that we chose the “ExperienceAnalyticsBarChart” rendering.
  3. Enter a proper name for it and hit Ok.
  4. Double click on the new parameter that you added in order to configure the metrics there.
  5. Choose the “Count” option from the “metrics” field and hit save.

Last step we should do is to bind the bar chart we created with the parameters item that we added. This is done by doing the following:
  1. Right click on the report item and choose Task - Design Layout.
  2. Double click the chart item “ExperienceAnalyticsBarChart control”. In the Edit Rendering Properties box – Behaviour – Datasource, browse the location of the parameter you created.
  3. Click Ok.

We are done now! You can go the Experience Analytics dashboard to check the report you created:


Note: The data is being displayed from the view that is in the Analytics database (dbo.SiteSearches)

Happy Sitecore Coding!