Sunday, May 21, 2017

Sitecore Publishing Service on CM – CD Environments

Publishing Service is one of the great features Sitecore has. I used to have issues publishing my site as there are lots of items in there and it was a slow procedure since that you need to wait until the publishing ends so that you would be able to continue working on Sitecore. 

Now, with this service, you are able to continue working on Sitecore while publishing your site, plus this process is much faster than before.

The reason behind me writing this blog is to focus on the publishing service installation on a content management server as I faced a couple of issues before installing it on sitecore, so I would like to share those issues with you.

 As we know, one of the basic steps that needs to be done before installing the service is to install the .NET Core. When I followed the steps to install the service host, I used to get an error when trying to test if the service works before installing it on Sitecore (you should get the following result {"status":0} usually to make sure that the service works fine but I never got it).
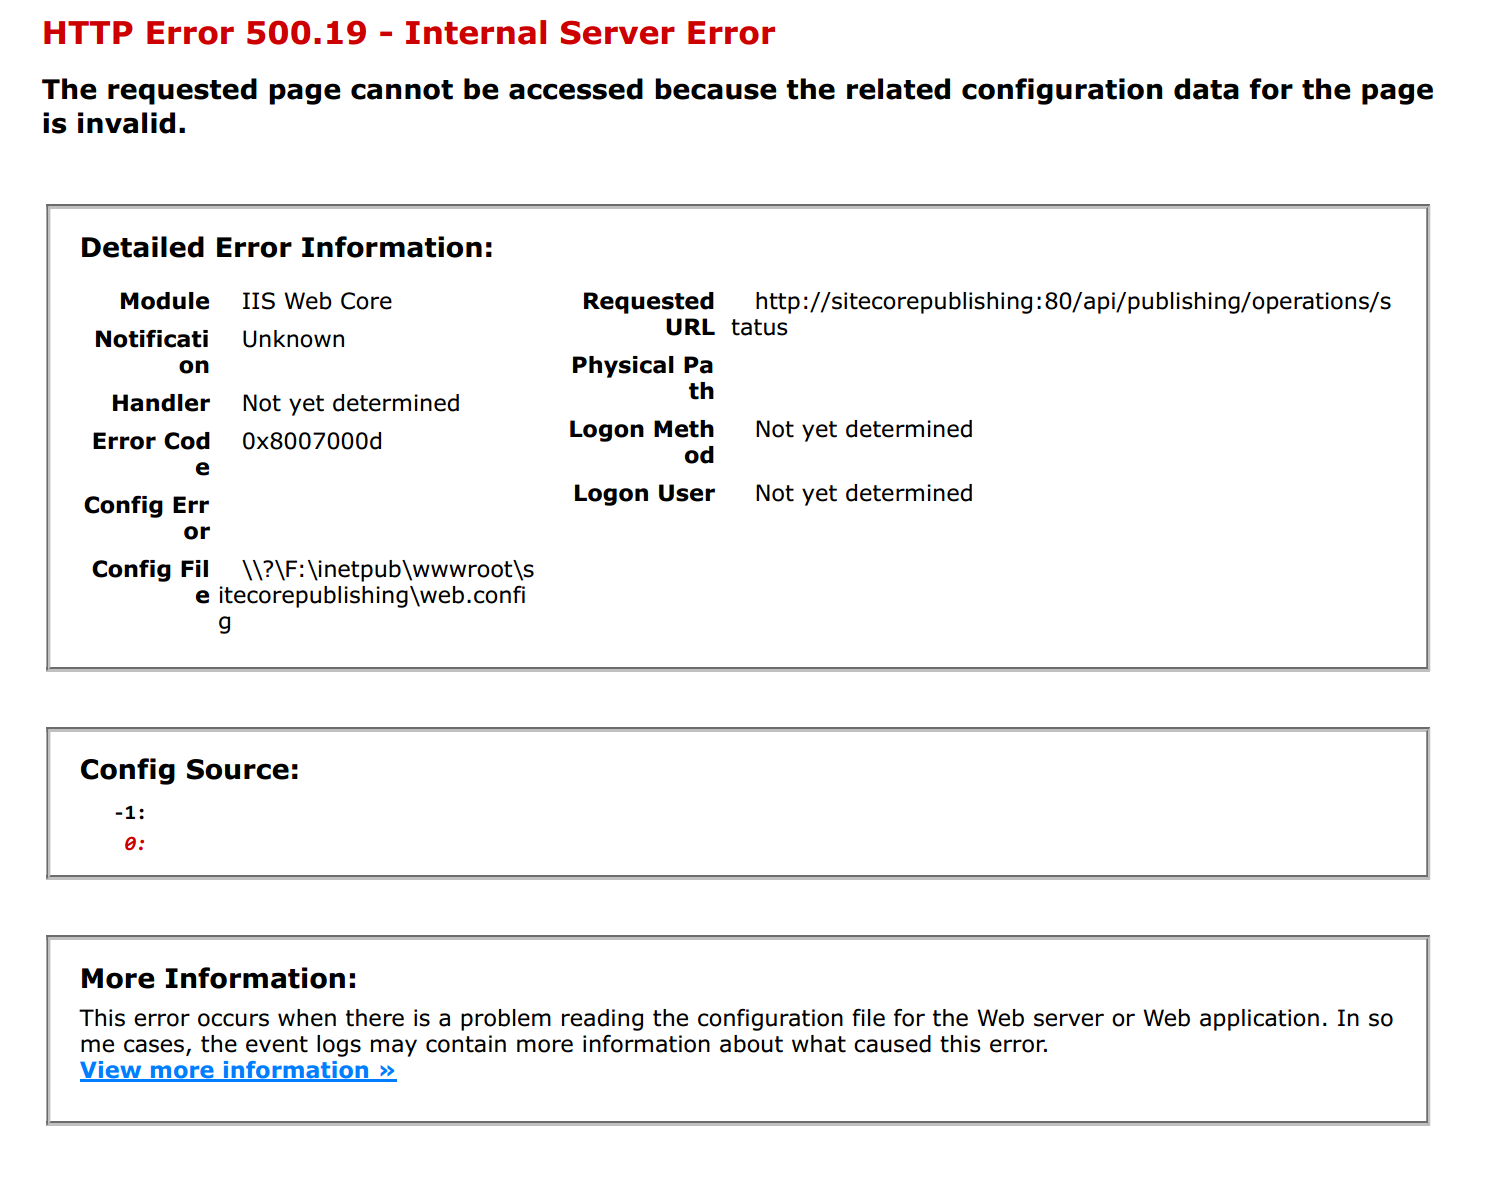
The error was not informative to be able to figure out the issue. After some investigation and the help of Sitecore Support, I found out that installing .NET Core is not enough on the CM server. You need to make sure that the ASPNetCoreModule is installed (This is required to host .NET Core projects in IIS). You can check if it is installed by opening IIS and looking for it in the modules section.

If you didn’t find it, you need to install ASP.NET Core Server Hosting Bundle (http://go.microsoft.com/fwlink/?LinkId=798480), and this would solve the issue.

When installing the service host and adding the connection strings file that connects the service with the Sitecore databases, you need to add another node for the pub database. Moreover, you need to add a target definition node under the “targets” node for the pub database:


Note: The target node should have the same name as the publishing target item name in Sitecore. Ex.: “DEV-CM”.

Hope this blog is useful :)

Monday, February 13, 2017

Custom Experience Analytics Reports

Sitecore has really cool features to implement. One of them is creating custom reports in the Experience Analytics Dashboard. Sometimes, customers need to know essential information in order to improve their website.

In order to improve the website content and words used in its pages (SEO), the customer needs to know what are the most used words in the site search. Therefore, I am going to walk you through the steps to track the words used in the site search and creating a report that displays those words and how many times are they being searched for.

By default, the internal search keywords are not being tracked in Sitecore. Therefore, in order to track them, appropriate search event should be registered when the search occurs.

Following code should be added when the user searches for a word in the site, and hits submit:


The above code means that the search keyword is being tracked and saved in Interactions table in the analytics mongoDB:


The data then gets aggregated to the “Fact_SiteSearches” table in the Analytics database in SQL.
We’re almost there! All what we have to do now is to create a custom report in the Experience Analytics Dashboard to show the words and their count.

To create a report page, you should do the following:
  1. You should have Sitecore rocks installed and a connection created to your website.
  2. Navigate to the core database in the website content tree using the following path: core/sitecore/client/Applications/ExperienceAnalytics/Dashboard
  3. Right click on any report category (for example Aquisition), and click on Add – New Item.
  4. Select the “ExperienceAnalyticsReportPage” template, and enter a term (recommended to start with “experienceanalytics”).
  5. Click Ok.
  6. There will be PageSettings created by default under the report item you just created.

Now, we have to choose a chart component to the report created. In order to do so, follow the below steps:
  1. In Sitecore Rocks, right click on the report page item you created, and click on Tasks – Design Layout.
  2. In the Design Layout, click on Add Rendering.
  3. In the dialog box, select a chart control to use for your report (Example: select an “ExperienceAnalyticsBarChart” if you want to display a bar chart).
  4. Click Ok after choosing the rendering you want.

After that, you need to add a parameters item to configure the report metrics (which will be “Count” in our example):
  1. Right click on the PageSettings item that is under the report item that you created and click Add- New Item.
  2. We will have to choose the “ExperienceAnalyticsBarChart Parameters” since that we chose the “ExperienceAnalyticsBarChart” rendering.
  3. Enter a proper name for it and hit Ok.
  4. Double click on the new parameter that you added in order to configure the metrics there.
  5. Choose the “Count” option from the “metrics” field and hit save.

Last step we should do is to bind the bar chart we created with the parameters item that we added. This is done by doing the following:
  1. Right click on the report item and choose Task - Design Layout.
  2. Double click the chart item “ExperienceAnalyticsBarChart control”. In the Edit Rendering Properties box – Behaviour – Datasource, browse the location of the parameter you created.
  3. Click Ok.

We are done now! You can go the Experience Analytics dashboard to check the report you created:


Note: The data is being displayed from the view that is in the Analytics database (dbo.SiteSearches)

Happy Sitecore Coding!


Monday, January 23, 2017

Experience Analyitcs and Rebuilding Reporting Database (Part 2)


Previously, we talked about checking if there was any issues preventing the rebuild process from being executed using the debugging mode in the config files. Today I will focus on rebuilding the reporting DB when having a multi environment setup (Content Authoring and Content Delivery environments).

I used to have issues rebuilding the reporting DB on content authoring server. There are a couple of steps that you need to do to ensure that the processing is working correctly on CM server:

1- Enable the following configs in the CM server:

a- In App_Config\Include\ExperienceAnalytics folder:
  • Sitecore.ExperienceAnalytics.Aggregation.config
  • Sitecore.ExperienceAnalytics.Reduce.config
  • Sitecore.ExperienceAnalytics.StorageProviders.config
b- In  App_Config\Include\folder:
  • Sitecore.Analytics.Processing.Aggregation.Services.config
  • Sitecore.Analytics.Processing.Services.config
  • Sitecore.PathAnalyzer.Processing.config
2- Make sure that the Segments table of the Reporting database is not empty and contains 35+ segments.


If it is empty, please perform the steps mentioned in the following post:

3- Perform the rebuild of the Reporting database:


4- Check Experience Analytics reports.

Note: it is recommended to use a clean copy of Sitecore_Analytics database in order to get best results.

To check what goes wrong as you go through the rebuild process, you can perform a following test:

a) Start the rebuild again and wait for HistoryProcessing state.
b) Open the HistoryTasks collection in the analytics database, there should be a history task record with the statistics information.
c) Check how many records are present in the ProcessingPool collection of the tracking.history database.
It should help you understand if any tasks are added.
d) Check if the records are being added to the [Fact_Visits] table in the sitecore analytics database (SQL). In case no historical records are being added - then the rebuild is still not working correctly.

One of the issues that I faced also is that the tracking_contact db was not created for some reason in the Mongo DB. You should make sure that it is there too.

Sometimes when developers upgrade from an old sitecore version to a newer one, some of the config files don’t get updated. So one of the main config files that does the rebuild is Sitecore.Analytics.Processing.Aggregation.ProcessingPools.config. Make sure that you have the updated one for the version that you’re upgrading to.

I hope this information helps! 


Thursday, January 19, 2017

Experience Analyitcs and Rebuilding Reporting Database (Part 1)

There is a very interesting feature in sitecore that everybody should make use of. Users need to check out some reports that analyze the ways that contacts engage with their website. 

What is Experience Analytics?

Experience Analyitcs dashboard provides reports for marketers and marketing analysis to identify patterns in experience data that is collected from the website.

Rebuilding Reporting Database

Sometimes users need to upgrade from older sitecore versions to newer ones. Therefore, merging historical data from earlier versions of Sitecore with live xDB data is essential to make all the data available to Sitecore reporting applications. This process is called “rebuilding the reporting database”.

To ensure that the reporting database has all the latest changes, you need to rebuild from time to time.
I have gone through this experience and faced a lot of issues during this process. Sometimes the rebuild process gets interrupted due to several reasons.

One of the main things to know if there are any errors that caused this interruption is to go through the log files to see if there are any errors. In order to know if the error is related to processing pools, you should perform the following steps to enable the errors being registered in the log files:

1. In Sitecore.config file, set the log4net logging level to DEBUG in the <log4net> node:


2. In Sitecore.Analytics.config file, set the "Analytics.LogLevel" setting value to Debug:


3. Start the rebuild, wait until it is finished, and then check out the sitecore log files to                         see if there are any errors caused.

The Debug log level adds additional information about the agents/history tasks to the log files, so it should help identifying the step where the rebuild is failing.

Next part, I will tackle some issues that need to be checked and fixed if your rebuild process did not go through. Let's continue!


Wednesday, October 19, 2016

Downloading Sitecore Media Library images to your local machine

My previous blog talked about uploading images from a certain directory to Sitecore media library using the advanced options. This blog will talk about downloading images from sitecore media library.

If you want to download a bunch of images from a certain folder under sitecore media library, you can simply run the following code on an aspx page:

Hope this is useful!

Thursday, October 6, 2016

Uploading images programmatically

As we all know, there are three types of image uploading in sitecore:

1- Upload files: which uploads a single or multiple files from the same location.
2- Upload files (advanced): which allows the user to upload using several options like uploading zip files, or overwrite duplicate files.
3- Drag and Drop: which allows the user to drag and drop several files.

What I am going to explain now, is how to upload images using the upload files (advanced) option using code. This way you can loop through a certain directory on your system, editing options for every single image, then uploading it in a certain folder in the Media Library in Sitecore.

Following is a simple code snippet that loops through a certain directory, edits options and uploads them in a certain folder under Media Library:


You can also get the alternate text for example from the item in sitecore by searching for the item that has this image and get the item name to put in the alternate text. This scenario is useful when you are overwriting an already existing image that is used in only one item in sitecore.

Next time I will post blog of how to download images programmatically from sitecore to a certain location on your system.

Hope this is useful!